Sunday, February 27, 2011

Photo of the Week: Week 2

My camera was laying right next to me, and I couldn't resist taking a picture of my bear. To be honest, the reason that I chose this picture for the photo of the week is that I think it's adorable and I love it. There's not much else to it. I didn't take this picture for an assignment or anything, I just happened to shoot this picture and really liked it. So here it is!

Saturday, February 26, 2011

Cars!

A few months ago, I went for a walk around N.C. State's campus and ended up taking pictures of cars. I think they turned out really good, so I thought I'd share them with you!

Wednesday, February 23, 2011

Justin & Katie | Couple

This past summer, I had a chance to go to Elon University with my brother and sister-in-law to take some couple pictures! Justin and Katie chose Elon because it is their Alma Mater. The two tied-the-knot last April! I love them both very much and I'm so glad that I had this opportunity to take pictures for them. Aren't they the cutest couple? Enjoy!


Tuesday, February 22, 2011

News Update on the Gallery!

Hello all! I wanted to let you know that the Gallery section of my page is now up and running! I am still editing old photos and trying to get them uploaded as fast as possible! When you see a post on my main page that displays pictures from a shoot, you will most likely also be able to find a link to them in the Gallery section. These links will take you to the picture gallery page on Flickr. Please check it out!

Also, please check out my Facebook page!! I hope everyone is having a wonderful evening!

Monday, February 21, 2011

April Barnes | Senior Pictures

In September, my roommate asked me to take some senior pictures for her since she had never gotten them taken in high school. April is a fun, beautiful, and wonderful friend. I am so glad I had the opportunity to work with her! These are her Senior portraits.


Friday, February 18, 2011

Photo of the Week: Week 1

Sorry it has been a while since my last post. This week was so crazy! This past week in my photography class, I was given an assignment called "Hands".  This was the assignment:

"Photograph an entire roll of any one subject with a normal 50 mm lens which requires you to get close to the subject in order to fill the frame. Include a variety of angles, distances, and interpretations of this one subject. Work with the available light exploring the exposure combinations necessary in multiple settings. Bracket each scene with three shots: the indicated exposure, plus one as well as minus one exposure value. Use these to creatively enhance the subject."

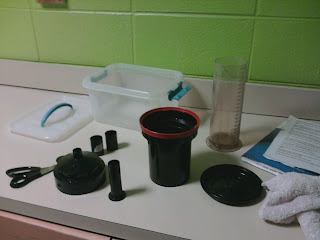
For this assignment, my subject was coffee mugs/cups. I took many pictures with my film camera, so I can not post those photos on here (I may take some digital pictures of the printed pictures and post them on here later), but this was one I really liked, so I also took a picture with my digital camera. So this is my photo of the week!

I challenge you to try the same project. Pick one subject (it could be hands, feet, shoes, windows, doors, etc.) and see what creative ways you can come up with to photograph it. Be aware of lighting and try to use it to your advantage. Play around with the exposure settings on your camera. Like the assignment says: try one picture at the correct exposure, plus one exposure, and minus one exposure. It's a really good way to play around with the lighting you have to work with.

Saturday, February 12, 2011

Shutter Speed

If you are a photographer, it is crucial to learn how lighting and shutter speed can affect your pictures. If you just like taking pictures, you could leave your camera on an automatic setting and it will take good pictures. If you are considering photography as a career you need to learn what settings will capture the best pictures. This week in my black and white photography class, we learned how fstop settings (which controls the amount of exposure) and shutter speed settings can really help you capture a beautiful photo. I want to show you an example of how important it is to know your camera and know what settings will help you capture that awesome picture. If you look at the picture below of the water dripping off of the icicles, you can see that there is a difference. In the picture on the left, I left my camera on the no flash setting (it looks like a circle with a lightning bolt crossed out).
As you can see, the water dripping off of the icicles is blurred, which looks okay but I thought it may be cool to be able to do a stop motion picture and see if I could catch the water droplets actually falling off of the icicles. In the picture on the right, I changed the setting to the motion setting (which looks like a little man running) and took the same picture again. As you can see, the water droplets are no longer blurred. This is because I sped up the shutter speed. I was able to capture the individual water droplets because the picture was exposed for a shorter amount of time. I could have slowed it down even more for even clearer droplets, but I just wanted to show you a basic example of how the shutter speed is important.

Wednesday, February 9, 2011

Finally got the new blog exactly the way I want it! I had to create a new design for the top of the page, but I really love how it turned out. I'm going to start posting pictures ASAP, but school does come first. I am also hoping to get some of my black and white film photography pictures up sometime! I worked for 4 1/2 hours last night developing film and making prints of pictures. Below are a few pictures I took in the lab (sorry about the quality, I took them with my cell phone). It's a really neat process and it is a really great learning experience. I think if you like photography as a hobby, you should definitely look into taking a black and white film class. Anyways, check out the rest of my blog! Several pages are not finished yet, but I will let you know when they are!


Here are the materials you use when developing film. First, you have to take the film out of the canister it comes in. Then you have to get the film onto these rolls (shown below) and wind them on. Then you put the rolls into the black bucket (shown above) and screw in the funnel so no light gets in. Oh, and did I mention that you have to do all of this in total darkness? It's a very difficult process, but it gets easier with more practice.


Once these are in the bucket with the funnel securely fastened, you can turn the lights back on. The funnel allows you to pour in the chemicals to develop the film without letting in any light. After you finish mixing all the chemicals, the disks must rinse in running water for 5 minutes. Then the film strips go into the dryer.

Saturday, February 5, 2011

New Beginnings

This is my first blog post on this blog! I just started my first semester studying Technical Photography at Appalachian University! I've really enjoyed it so far! I shot my first wedding two months ago, which was a really great experience. Enjoy!

If you are interested in a session, please contact me at simplyparisstudios@gmail.com or find my page on Facebook!